Introduction
Painting wine bottles can be a fun and creative activity that allows you to express your artistic side. Whether you are a seasoned artist or just starting, painting wine bottles can be a great way to unleash your creativity and create unique art pieces. In this guide, we will explore how to Paint a Wine Bottle and the benefits that come with it.
Unleash Your Creativity With Wine Bottle Painting
Painting wine bottles provides a blank canvas for experimenting with different colors, designs, and techniques. You can let your imagination run wild as you transform a simple glass bottle into a work of art. The possibilities are endless, whether you prefer abstract designs, intricate patterns, or nature-inspired motifs. Wine bottle painting allows you to explore different painting styles and techniques and learn and grow as an artist.
Benefits Of Wine Bottle Painting
Engaging in wine bottle painting offers several benefits beyond just creating beautiful artwork. Here are a few key advantages:
- Relaxation and stress relief: Painting is a therapeutic activity that can help you relax and reduce stress. It lets you focus on the creative process, giving you a break from everyday worries and concerns.
- Personalized gifts and home decor: Painted wine bottles make unique and personalized gifts. You can customize them for special occasions such as birthdays, weddings, or anniversaries. They also make eye-catching decorations for your home or office, adding a touch of creativity to any space.
- Environmental sustainability: By repurposing wine bottles and giving them a new life through painting, you contribute to environmental sustainability. Instead of throwing away the bottles, you transform them into something beautiful and extend their usefulness.
- Socialization and bonding: Wine bottle painting can be a social activity that brings people together. You can organize painting sessions with friends or join art classes to meet fellow art enthusiasts. It provides a platform for socialization and bonding through shared creative experiences.
In conclusion, wine bottle painting is a wonderful way to channel your creativity and enjoy the numerous benefits that come with it. So, uncork your creativity and start painting those wine bottles today!

Getting Started
Are you ready to uncork your creativity and dive into the world of wine bottle painting? This guide will walk you through the necessary materials and tips on choosing the perfect wine bottle for your painting projects.
Necessary Materials For Painting Wine Bottles
Before you begin your wine bottle painting journey, make sure you have the following materials ready:
- Wine Bottles: Collect empty wine bottles in various shapes and sizes. Ensure they are clean and free from any labels or adhesive residue.
- Acrylic Paints: Acrylic paints are the ideal choice for painting wine bottles. They offer a wide range of colors, are easy to work with, and dry quickly.
- Paintbrushes: Invest in a variety of paintbrushes to achieve different effects. Flat brushes cover large areas, while thin brushes work well for details and intricate patterns.
- Palette: Use a palette or a disposable plate to mix your paints and create custom color combinations.
- Sealer: To protect your artwork and make it more durable, apply a clear sealer or varnish once the paint has dried.
- Protective Gear: Wear old clothes or an apron to protect your clothing from paint splatters. Additionally, you may want to cover your workspace with newspaper or a drop cloth.
Choosing The Right Wine Bottle For Painting
When selecting wine bottles for your painting projects, consider the following factors:
- Shape: Wine bottles come in various shapes, such as round, square, or unique designs. Choose a shape that complements your artistic vision and the style you want to achieve.
- Color: Some wine bottles have colored glass, which can add an interesting visual element to your artwork. Consider how the color of the bottle will interact with the paints and designs you have in mind.
- Size: Depending on your painting technique, the size of the bottle can impact the level of detail you can achieve. Smaller bottles are great for delicate designs, while larger bottles provide more space for bolder strokes.
- Label: Ensure that the wine bottle’s label has been removed or covered to create a clean canvas for your artwork. Sticky residue can be removed using rubbing alcohol or adhesive removers.
By gathering the necessary materials and choosing the right wine bottles, you can embark on your wine bottle painting adventure. Unleash your creativity, experiment with different colors and techniques, and create stunning works of art that impress you and others. Cheers to uncorking your creativity and enjoying the process of painting wine bottles!
Preparation
Before you start painting your wine bottles, cleaning and preparing them properly is important. This will ensure that the paint adheres well and that your finished artwork looks professional. Here are some key steps to follow:
Cleaning And Prepping The Wine Bottle
The first step in preparing your wine bottle is to clean it thoroughly. Remove any labels or adhesive residue by soaking the bottle in warm, soapy water for a few minutes. Use a sponge or a scrub brush to remove any remaining residue gently. Rinse the bottle thoroughly and let it dry completely.
Priming The Wine Bottle For Better Paint Adhesion
To improve the adhesion of the paint to the glass surface, it is recommended to prime the wine bottle before painting. This will help the paint to adhere better and prevent it from easily scratching or peeling off.
Before priming, make sure the bottle is clean and dry. Apply a thin layer of glass or multi-surface primer using a brush or sponge. Make sure to cover the entire surface of the bottle evenly. Let the primer dry completely according to the instructions on the product.
Once the primer is dry, you can start painting your wine bottle. Choose your desired acrylic paints and brushes, and unleash your creativity. Experiment with different colors, patterns, and techniques to create unique, personalized designs.
Remember to let each layer of paint dry completely before applying the next one. This will ensure that the colors do not blend or smudge. Once you are satisfied with your artwork, you can seal it with a clear sealer or varnish to protect the paint and give it a glossy finish.
Now that you know how to clean, prep, and prime your wine bottles, you are ready to unleash your creativity and turn them into stunning works of art. Enjoy the process and have fun exploring different painting techniques. Cheers to uncorking your creativity and creating beautiful masterpieces with painted wine bottles!

Painting Techniques
If you want to uncork your creativity and transform a wine bottle into a stunning work of art, you can explore various painting techniques. Here are a few ideas to help you get started:
Different Painting Techniques For Wine Bottles
- Simple Solid Color: This technique covers the entire bottle with a single color of your choice. It creates a clean and elegant look.
- Gradient or Ombre: Take your painting to the next level by blending two or more colors to create a gradient or ombre effect. Start with a lighter shade at the top and gradually transition to a darker shade at the bottom.
- Abstract Designs: Let your imagination run wild and create unique abstract designs on your wine bottle. Use different brush strokes, patterns, and colors to showcase your creativity.
- Stenciling: Stenciling can be a great option if you’re not confident in your freehand painting skills. Choose a stencil design that reflects your style and interests, then carefully apply the paint within the stencil boundaries.
- Decoupage: Explore the world of mixed media by incorporating decoupage techniques. Use decorative paper, fabric, or even dried flowers to enhance the visual appeal of your wine bottle.
Tips For Achieving The Desired Look And Texture
To ensure your painted wine bottle looks professional and visually appealing, consider these tips:
- Use High-Quality Acrylic Paints: Invest in good quality acrylic paints that offer vibrant colors and excellent coverage.
- Apply Thin Layers: It’s better to apply multiple thin layers of paint rather than one thick layer. This will prevent the paint from clumping or dripping and allow for better control.
- Blend and Mix Colors: Experiment with color mixing to create unique shades and hues that complement your overall design.
- Add Texture: Consider adding texture to your painted wine bottle for a more interesting look. You can use techniques like stippling, sponging, or even adding a layer of glitter to create depth and visual interest.
- Protect Your Artwork: After painting and letting your bottle dry, apply a clear sealer or varnish to protect the paint and give it a glossy finish. This will ensure the longevity of your artwork.
By exploring different painting techniques and following these tips, you can uncork your creativity and transform ordinary wine bottles into beautiful masterpieces. Enjoy the process, and let your imagination guide you as you embark on this artistic journey. Cheers to creating unique and personalized painted wine bottles!
Design And Inspiration
Ideas For Designs And Styles On Wine Bottles
When it comes to painting wine bottles, the possibilities are endless. Here are some ideas to inspire your creative journey:
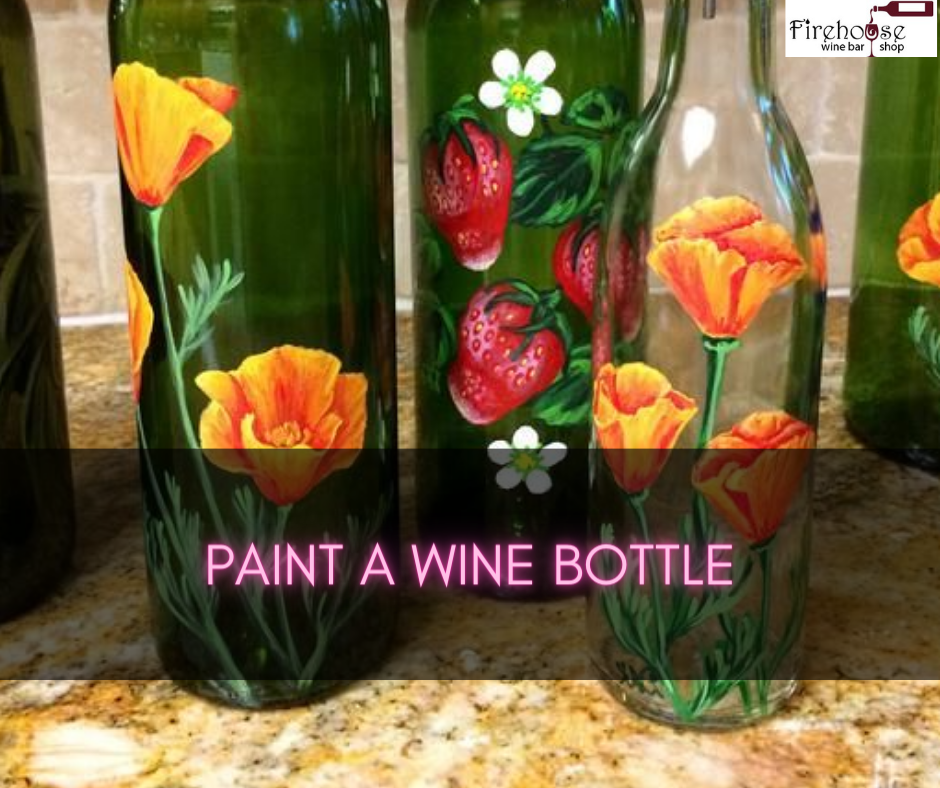
- Floral Delight: Embrace the beauty of nature by painting delicate flowers or vibrant botanical patterns on your wine bottle. This design adds a touch of elegance and charm to any home decor.
- Geometric Patterns: Create a modern and stylish look by experimenting with geometric shapes and patterns. From simple triangles and squares to intricate designs, geometric patterns can add sophistication to your painted wine bottle.
- Beach-Inspired: Bring the beach vibes to your home by painting your wine bottle with seashells, waves, or dunes. This design is perfect for those who long for coastal vacations or want to add a coastal touch to their living space.
- Whimsical Wonderland: Let your creativity run wild by painting whimsical creatures, dreamy landscapes, or fantastical scenes on your wine bottle. This design allows you to showcase your imagination and create a unique piece of art.
Finding Inspiration For Your Unique Creations
Looking for inspiration to kickstart your painting project? Here are some ways to find ideas:
- Online platforms: Browse social media platforms like Pinterest, Instagram, or art blogs for a wide range of wine bottle painting ideas. You can find step-by-step tutorials, inspiration boards, and a community of fellow artists to connect with.
- Nature and surroundings: Walk outside and let your surroundings inspire you. Look at the colors, shapes, and textures of plants, flowers, architecture, or even the sky. Nature provides a wealth of inspiration for your wine bottle designs.
- Art and design books: Visit your local library or bookstore and explore art and design books. These books often showcase different painting techniques and styles and provide visual inspiration from renowned artists.
- Personal experiences and interests: Draw inspiration from your experiences, hobbies, or interests. Whether it’s a memorable trip, a favorite book, or a passion for a particular art movement, incorporating elements that hold personal meaning can make your painted wine bottle truly special.
Remember, painting a wine bottle is about unleashing your creativity and expressing yourself. Don’t be afraid to experiment and create your unique designs. Let your imagination soar, and enjoy bringing your ideas to life on the canvas of a wine bottle. Cheers to uncorking your creativity!

Step-by-step Process To Paint A Wine Bottle
Detailed Instructions On How To Paint A Wine Bottle
Painting a wine bottle can be a fun and creative project that allows you to add a personal touch to your home decor. Here is a step-by-step guide on how to paint a wine bottle:
- Clean the Bottle: Clean the wine bottle thoroughly to remove any labels or residues. Use warm, soapy water and a scrub brush, then rinse and dry it completely.
- Prepare the Surface: If you want the paint to adhere better, consider slightly roughening the bottle’s surface with sandpaper. This will create a better texture for the paint to cling to.
- Prime the Bottle: Applying a primer can help create a smooth surface for painting. Choose a primer suitable for the bottle’s material, such as glass or plastic. Apply a thin, even coat and let it dry according to the manufacturer’s instructions.
- Choose Your Design: Decide the design you want to paint on the bottle. You can draw inspiration from the earlier ideas or develop your unique design.
- Sketch the Design: Use a pencil or chalk to sketch the design on the bottle lightly. This will serve as a guide when painting.
- Start Painting: Begin painting your design using acrylic or glass paints. Use small, fine brushes for intricate details and larger brushes for broad strokes. Apply thin layers of paint, allowing each layer to dry before adding more.
- Adding Finishing Touches: Once the design is complete, you can enhance it by adding additional details. Consider using metallic or glitter paints to add shimmer or a sealant to protect the paint and give it a glossy finish.
- Let It Dry: Allow the paint to dry completely before handling or displaying the painted wine bottle.
Adding Layers And Details To Enhance The Design
To enhance the design of your painted wine bottle, you can add layers and details using various techniques:
- Layering Colors: Experiment with layering different colors to create depth and dimension. Start with lighter shades and gradually add darker tones to create highlights and shadows.
- Blending Techniques: Use a dry brush or a sponge to blend colors smoothly. This technique can create a soft gradient or a textured effect.
- Add Texture: Consider using materials like stencils, stamps, or textured paint to add texture to your design. This can create a visually interesting and tactile element on the bottle.
- Fine Details: Use smaller brushes or a toothpick to add fine details, such as intricate patterns, tiny dots, or delicate lines. This level of detail can give your painted wine bottle a professional and polished look.
Remember, painting a wine bottle unleashes your creativity and adds a personal touch. Don’t be afraid to experiment with different techniques and designs. You can create a stunning art piece showcasing your uncorked creativity with practice and patience.
Finishing Touches
Once you have completed your painted wine bottle, there are a few finishing touches you can add to enhance its overall look and protection. Here are some suggestions to consider:
Sealing And Protecting The Painted Wine Bottle
After investing time and effort into painting your wine bottle, you will want to ensure the design stays intact and lasts for a long time. Applying a sealant can help protect the paint from chipping, fading, or getting damaged. Various types of sealants are available, such as gloss or matte finishes. Choose one that suits your preference and the look you want to achieve. Follow the instructions on the sealant product for the best application method. Applying multiple thin coats is usually recommended for a smooth and even finish.
Adding Embellishments And Decorations
You can add embellishments and decorations to enhance the painted wine bottle further. Consider using ribbons, twine, or lace to wrap around the neck of the bottle. This adds a touch of elegance and can coordinate with your overall home decor. You can also attach small charms or beads with glue for a more personalized touch. Another option is to use adhesive stencils or decals to create intricate designs or patterns on the bottle. This allows you to add extra details without precise painting skills.
Additionally, you can explore other creative ideas, such as attaching small artificial flowers or greenery to the bottle with adhesive or creating a unique label with custom text or graphics to personalize the bottle further.
Remember, the finishing touches give your painted wine bottle that extra wow factor, making it a standout piece in your home. Get creative and have fun experimenting with different ideas to make it your own truly.
Displaying And Enjoying Your Creation
Congratulations on successfully painting your wine bottle! Now, let’s discuss how to display and enjoy your creation creatively. Whether you paint wine bottles as a hobby or for home decor, there are plenty of options for showcasing your artistic talent and adding a personal touch to your space.
Creative Ways To Display Painted Wine Bottles
- Centerpiece: Transform your painted wine bottle into a stunning centerpiece for your dining table or coffee table. Place it alongside fresh flowers, candles, or other decorative items to create a visually appealing arrangement.
- Vase: Use your painted wine bottle as a unique vase for displaying flowers or branches. It adds a touch of creativity and charm to any room.
- Home Decor Accents: Incorporate your painted wine bottle into your home decor by placing it on a bookshelf or mantel. It can act as a standalone statement piece or complement other decorative elements.
- Outdoor Decor: Take your painted wine bottle outside and use it to decorate your patio or garden. It can be a beautiful addition to your outdoor space, adding color and creativity.
Using Painted Wine Bottles As Personalized Gifts
Painted wine bottles make wonderful personalized gifts for your loved ones. Here are some ideas to consider:
- Special Occasions: Paint a wine bottle to celebrate birthdays, anniversaries, or weddings. Customize it with the recipient’s favorite colors or motifs to make it extra special.
- Seasonal Gifts: Capture the spirit of different seasons by painting wine bottles with seasonal themes. Whether it’s a winter wonderland or a vibrant spring design, these personalized gifts will surely be cherished.
- Homeowners: If someone you know has recently moved into a new home, gift them a painted wine bottle to add a personal touch to their space.
- Thank You Gifts: Express your appreciation by gifting a painted wine bottle to someone who has been there for you. Choose colors and designs that reflect their personality and show how much you value their support.
Consider the recipient’s taste and preferences when displaying or gifting painted wine bottles. Let your creativity shine, and enjoy the joy your beautifully painted wine bottles bring to others’ lives.
Conclusion
Now you should know how to Paint a Wine Bottle. Painting wine bottles is not only a creative and enjoyable activity, but it also offers a variety of ways to display and enjoy your artistic creations. Whether you use them as decorative pieces in your own space or give them as personalized gifts, painted wine bottles add a unique touch to any setting. Using your imagination and artistic skills, you can transform ordinary wine bottles into stunning works that reflect your style and personality.
The Joy And Satisfaction Of Painting Wine Bottles
There is a certain joy that comes from engaging in a creative pursuit, like painting wine bottles. Choosing colors, designing patterns, and applying brushstrokes can be incredibly satisfying and fulfilling. It allows you to express yourself artistically while also providing a sense of relaxation and mindfulness. The result of a beautifully painted wine bottle can bring a sense of pride and accomplishment.
Unleash Your Creativity And Create Stunning Works Of Art
Painting wine bottles offers a blank canvas for your creativity to shine. With a wide array of techniques and styles to explore, you can unleash your imagination and experiment with different designs, colors, and textures. The possibilities are endless, from intricate patterns and landscapes to abstract art and motifs. Each painted wine bottle is a unique piece of art showcasing your style and artistic flair.
Following the steps and techniques outlined in this guide, you can confidently embark on your wine bottle painting journey. Remember to gather the necessary supplies, choose high-quality paints, and let your creativity guide you. Whether you are painting for yourself or as a thoughtful gift for someone else, enjoy the process and embrace the joy that comes from unlocking your artistic potential.
So, uncork your creativity, grab a paintbrush, and start painting those wine bottles – you never know what masterpieces you might create!
FAQ about Paint a Wine Bottle – Uncork Your Creativity: A Guide to Painting Wine Bottles
Q: What materials do I need to paint a wine bottle?
A: To paint a wine bottle, you will need acrylic or glass paint, a paintbrush or sponge, glitter (if desired), and a spray bottle filled with odorless mineral spirits.
Q: Can anyone paint a wine bottle, regardless of age or skill level?
A: Yes, painting a wine bottle can be fun for all ages and skill levels! It is a great project for kids to do with their parents, and seniors can enjoy it. The project usually takes under an hour to complete.
Q: What are some ideas for decorating wine bottles?
A: There are endless possibilities for decorating wine bottles! Some ideas include using paint and glitter to create eye-catching decorations, designing them as candle holders for the holiday season, creating a border for your garden or planting area, or turning them into tiki torches for outdoor social events.
Q: How do I remove the label from a wine bottle before painting it?
A: To remove the label from a wine bottle, soak it in hot water for a few minutes to loosen the adhesive. Then, gently scrub the label with a sponge to remove it. Any remaining adhesive can be removed by spraying the bottle with odorless mineral spirits.
Q: What type of wine bottles can be painted?
A: Any wine bottle can be painted, but Bordeaux-style bottles, which have straight sides with tapering shoulders, are the most commonly used for painting. However, wine bottles of different sizes, shapes, and colors can all be repurposed and decorated.
Q: How do I prepare the wine bottle for painting?
A: Before painting the wine bottle, it is important to wash both the inside and outside of the bottle with soap and water. Make sure to turn the bottle upside down and let it dry completely. This step removes any oils or residue on the bottle surface, allowing the paint to adhere properly.
Q: What are the benefits of repurposing wine bottles for decoration?
A: Repurposing wine bottles for decoration allows you to unleash your creativity and helps promote sustainability. Giving these bottles a new purpose reduces waste and contributes to a greener environment. Additionally, decorating wine bottles can add a unique touch to your home or event decor.
Remember, painting wine bottles is a fun and creative way to repurpose them for decoration. Let your imagination flow and experiment with different colors and designs to create unique, eye-catching pieces. Cheers to uncorking your creativity!

Andre Lotz immigrated to the United States from South Africa almost 20 years ago. Still, he didn’t feel truly at home until he settled in Mobile—a city that reminds him of his childhood home of Fish Hoek on the southern cape of Africa.